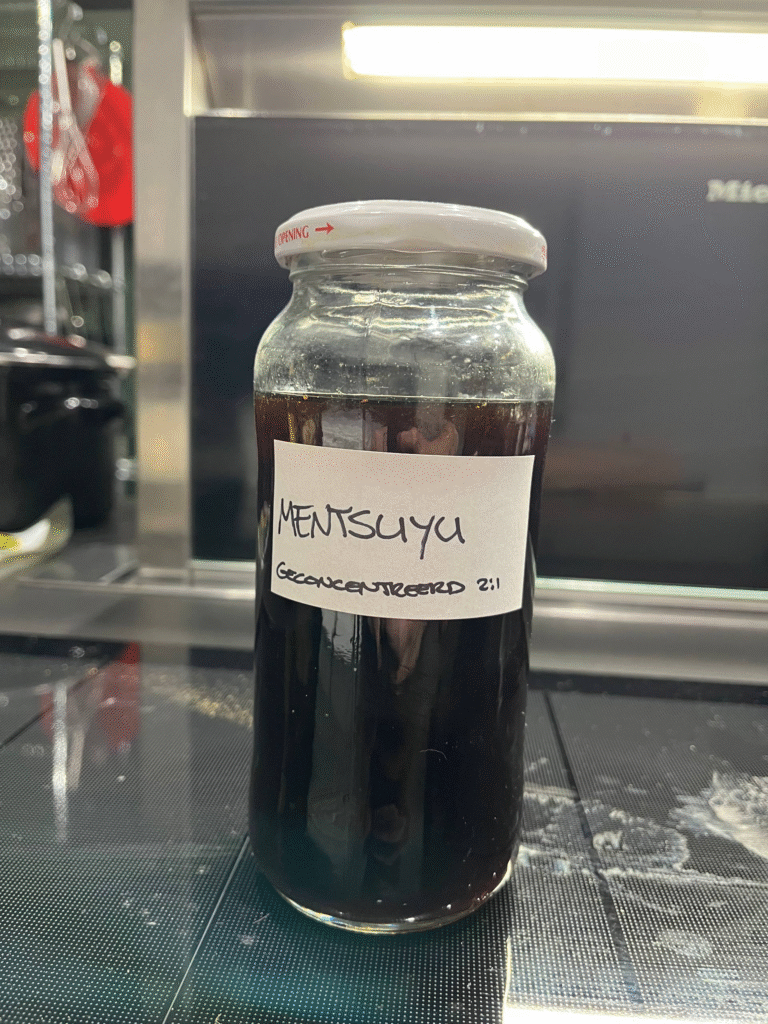
1 cup dark soy sauce. The saly type, not the sweet one.
1 piece kombu 14 x 18 cm
1 cup katsuobushi or bonitoflakes
How to make:
Add everything in a saucepan
SLOWLY bring it to a boil on medium heat
Simmer on low for 5 minutes
Pour through a sieve into another container
Done.
Remember that this is a concentrated brew, so use two parts water and one part Mentsuyu. If you use this for Tonkotsu, use 30-40 ml per bowl of 250-300 ml of broth.
I have to work with software ejecta named ArchiCAD (it’s not that bad, but i am so sick and tired of my job lol) and once in a while you get the following message:
"Error cannot create temporary documents"
It can be fixed easily by doing the following:
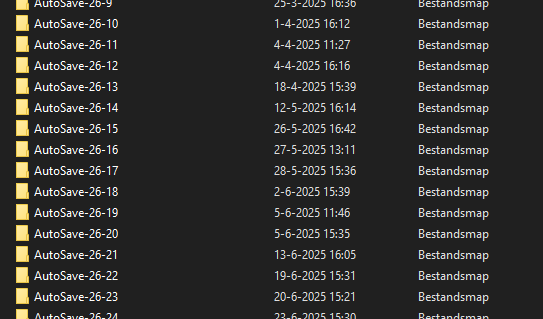
Go to the drive where you are storing the USERS folder.
Open the user’s folder
Open the Graphisoft folder
—> So basically “C:\Users\USERNAME\GRAPHISOFT”
You will see the following folders:
Delete all those AutoSave-xx-xx folders except for the most recent one which is just named AutoSave-xx (xx for the version of your archicad software) In my case, the total amount of data in these folders was 85Gb. That’s Eighty-Five Gigabyte…..
It has been one of those days. Plex has been hacked AGAIN and now we all need to do the whole song and dance regarding changing passwords and reclaiming servers.
Log out of plex.tv
Log out of your local plex account ([local IP:32400/web])
Stop Plex
Open Preferences.xml
Remove everything between the quotes at the following items: PlexOnlineName, PlexOnlineEmail, PlexOnlineToken and PlexOnlineHome which may or may not exist at all.
Save the file
That’s part one. Onwards to part two:
Goto https://plex.tv/claim
Copy the token
Open the terminal of your plex server
type the following
curl -X POST 'http://127.0.0.1:32400/myplex/claim?token=PASTEYOURTOKENHERE'
Press enter and wait
Did it spew out a whole lotta text after half a minute or so? Nice.
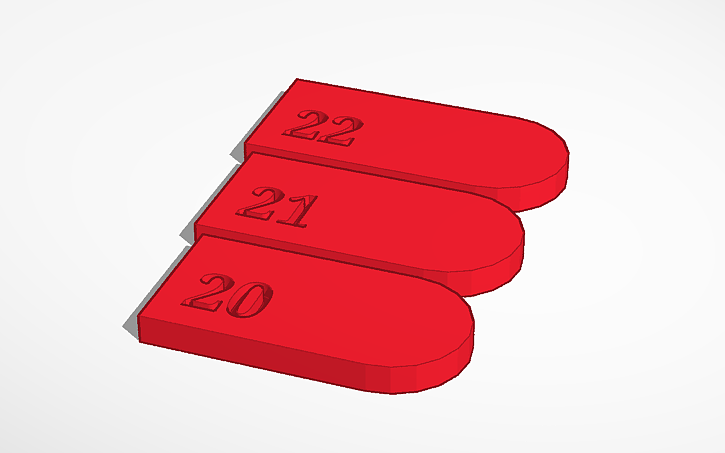
The misfires in the Browning BL-22 were caused by a locking plate that was no longer within the correct dimensions. This issue is well documented on this website.
At one point, I 3D printed a few test plates, which made it easy to measure and determine the proper dimensions needed to eliminate the excess play in the bolt.
You can print these plates yourself and fine-tune their size until the gap between the barrel and the bolt is completely eliminated.
That makes total sense, doesn’t it? Apparently, for one nation and some other small country on this boulder we live on, it does.
So I needed a small mounting bolt for my american made, weapon. Silly me assumed that this was standard thread that everyone is using, but no. Eventually, after a lot of measuring, I figured out that the cut of the thread was Whitworth G40-1/8 and the estimated width of the bolt was 4,20mm and the length was 3,18mm. After a long search, I now know that i need to search for the following bolt:
#8-40 x 1/8
#8 means that the gauge is 0.164 in. or 4.17 mm
40 stands for the threads per inch, in this case classified as “fine”.
TPI 40 = 0,025″ Pitch in Inches or 0,635 Pitch in Millimeter.
1/8 stands for the length of the bolt. (Actual size 0.1255″ or 3.1877mm)
So I just ordered #8-40 x 1/4 because I need longer bolts. And I was unable to find them here in The Netherlands. So AliExpress came to the rescue!